How to Clean an Electric Pressure Cooker (Every Part, Done Right)
Unplug the cooker and let it cool completely before touching anything. Remove the inner pot, lid, sealing ring, and steam-release valve, then wash each part separately. The outer base with the heating element never goes in water.


Before You Start: Safety First
Always unplug the pressure cooker from the wall and give it at least 20 to 30 minutes to cool down before disassembly. Steam and residual heat can cause burns even after the pressure indicator drops. Never submerge the outer base or the control panel in water, because the electrical components are housed there. If your cooker has a Keep Warm function that ran after cooking, assume the base is still warm and wait a few extra minutes.
Cleaning the Inner Pot
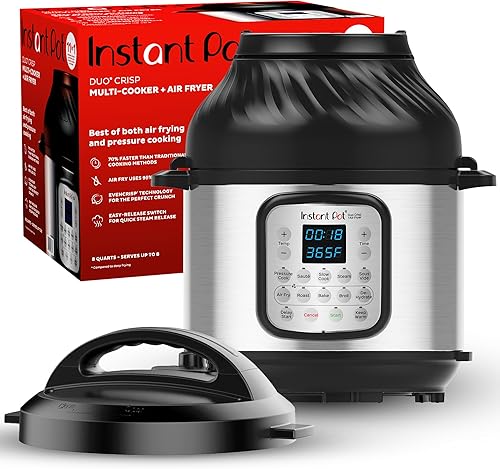
The stainless steel inner pot that ships with most electric pressure cookers, including the Instant Pot 3QT Duo (rated 4.7 stars across 184,700 reviews) and the Instant Pot Duo Nova 60 (4.7 stars, 22,500 reviews), is dishwasher-safe on the top rack. Hand washing with warm soapy water and a soft sponge works just as well and puts less wear on the finish. Avoid steel wool or abrasive scrubbers, which scratch the steel and create pits where bacteria can settle. For stuck-on food, soak the pot in warm water for 15 minutes before scrubbing. A rainbow or blue discoloration on the steel is a normal reaction to heat and high-mineral water, and a paste of baking soda and water rubbed in gently will fade it.
Cleaning the Sealing Ring
The silicone sealing ring sits in the groove on the underside of the lid and is the part most likely to hold cooking odors. Remove it by pulling it out of the groove, then wash it with dish soap and warm water, or run it through the dishwasher in the utensil basket. If it smells strongly of garlic, onion, or spice, soak it in a bowl with one cup of white vinegar and enough water to submerge it for 15 to 30 minutes. For persistent odors, place the clean, dry ring in direct sunlight for a few hours, which naturally breaks down odor compounds in silicone. Check the ring each time you clean it for cracks, tears, or any stiffening, because a damaged ring will not seal properly and the cooker should not be used until it is replaced.
Cleaning the Lid, Steam Vent, and Float Valve
The lid itself can be wiped down with a damp cloth or rinsed under the faucet, but keep water away from any electronic components if your model has sensors in the lid. The steam-release valve and float valve (the small silver pin that rises under pressure) both need to be removed and rinsed separately under running water. Residue from starchy foods like beans or oatmeal can clog the float valve and prevent the cooker from reaching pressure. Hold the float valve under warm water and push the silicone cap up and down a few times to make sure it moves freely. The steam-release valve can be pulled straight off most models and soaked in soapy water for a few minutes. Dry all these small parts thoroughly before reassembling, because trapped moisture under the float valve cap can cause sealing problems.
Wiping Down the Outer Base and Heating Element
The outer housing and the heating-element cavity at the bottom of the base accumulate drips and condensation over time. Wipe the outside with a damp cloth and mild dish soap, then dry it right away. For the inside of the base where the inner pot sits, use a damp cloth or a cotton swab to clean around the heating element, making sure no water pools in the cavity. The Instant Pot model 140-0021-01 runs at 1,500 watts and has a 8 qt capacity, which means food debris on the heating surface can cause uneven heating or, over time, odors during cooking. Never spray cleaners directly into the base cavity.
Reassembly and a Quick Function Check
Before reassembling, make sure every part is fully dry. Press the sealing ring back into its groove all the way around, a gap anywhere will prevent the cooker from pressurizing. Replace the float valve cap and click the steam-release valve back into place. Fill the inner pot with one cup of water and run a short pressure test (most models have a Steam setting) to confirm the lid seals correctly. If the cooker fails to reach pressure or takes far longer than normal, check that the sealing ring is seated evenly and the float valve moves freely. Store the cooker with the lid inverted or resting loosely on top rather than locked, which lets the sealing ring air out between uses and extends its life.
Common mistakes to avoid
- Washing the outer electrical base under running water or in the sink, which can damage the control board.
- Skipping the steam-release valve and float valve because they look clean, then finding them clogged with starch residue.
- Locking the lid down tight during storage, which traps moisture and odors against the sealing ring.
- Using abrasive pads on the stainless steel inner pot, which scratch the surface and make future cleaning harder.
- Reassembling a damp sealing ring, which leads to mold growth in the groove over time.
- Ignoring small tears or stiffness in the sealing ring, which compromises pressure and makes the cooker unsafe to use.
Frequently asked questions
Can I put the inner pot of my electric pressure cooker in the dishwasher?
Most stainless steel inner pots are dishwasher-safe on the top rack. Hand washing with warm soapy water and a non-abrasive sponge is gentler and keeps the finish looking better over time. Always confirm with your specific model's manual, since a few pots with non-stick coatings require hand washing only.
How do I get the smell out of my pressure cooker's sealing ring?
Soak the ring in a mixture of one cup white vinegar and enough water to cover it for 15 to 30 minutes, then rinse and air dry. Sunlight is also effective, since UV exposure breaks down odor compounds in silicone. If the smell persists after several treatments, replacing the ring is the most practical fix, since silicone does absorb odors permanently over time.
How often should I replace the sealing ring?
Replace the sealing ring every 12 to 18 months under regular use, or sooner if it shows cracks, tears, or has become stiff and no longer stretches easily into the lid groove. A degraded ring will allow steam to escape and prevent the cooker from reaching full pressure. Keeping a spare ring on hand means you can swap it immediately without waiting for delivery.
My pressure cooker is not reaching pressure after cleaning. What did I do wrong?
The most common cause is a sealing ring that was not pressed all the way around the lid groove, leaving a small gap. The second most common cause is the float valve being blocked by debris or trapped moisture under its silicone cap. Remove the lid, reseat the ring firmly, check that the float valve moves freely up and down, and try again with at least one cup of liquid in the pot.
Is it safe to clean the steam-release valve?
Yes, and it is important to do so regularly. Pull the valve straight off the lid, rinse it under warm running water, and use a toothpick to clear any visible residue from the opening. Starchy foods like rice, oatmeal, and beans can partially clog the valve, which affects steam release and pressure accuracy. Dry the valve completely before putting it back.